In the first part of the article series, we have configured the windows Azure lab and office 365 account and in the second part, we had configured ADFS and ADFS Proxy server.
Now, in this part of the series we will be configuring Single Sign on (SSO) and Directory synchronization between the On-Prem and Office 365.
I. Configuring SSO between office 365 and Exchange 2013 On-Premises
II. Configuring Directory Synchronization between Office 365 and Exchange 2013 On-Premises
Other part of the articles are be found below
Office 365 Hybrid Configuring Using Windows Azure – Part 1
Office 365 Hybrid Configuring Using Windows Azure – Part 2
Office 365 Hybrid Configuring Using Windows Azure – Part 4
Office 365 Hybrid Configuring Using Windows Azure – Part 5
Office 365 Hybrid Configuring Using Windows Azure – Part 6
Configuring SSO between Office 365 and Exchange 2013 On-Prem
1. Connect to server krisadfs.cloudapp.net and login with the domain admin credentials.
2. ‘Microsoft online service sign-in Assistant’ is a prerequisite for installing ‘Windows Azure Active Directory Module’ to configuring Single Sign On
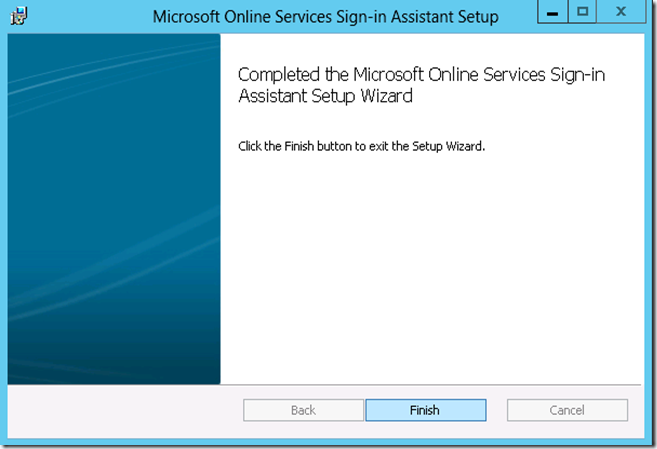
Download and perform the default installation of Microsoft Online Services Sign-In Assistant for IT Professionals
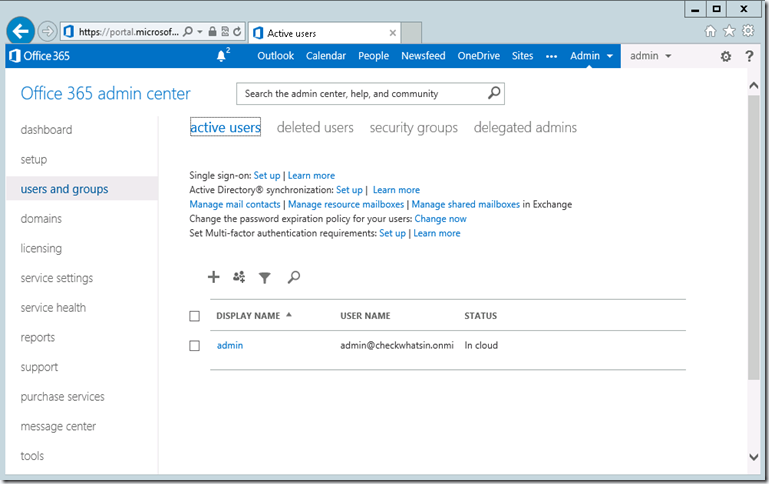
3. Login to the Office 365 portal using Internet Explorer and click on “users and group” on the left pane and click on Single Sign-on “Set up”
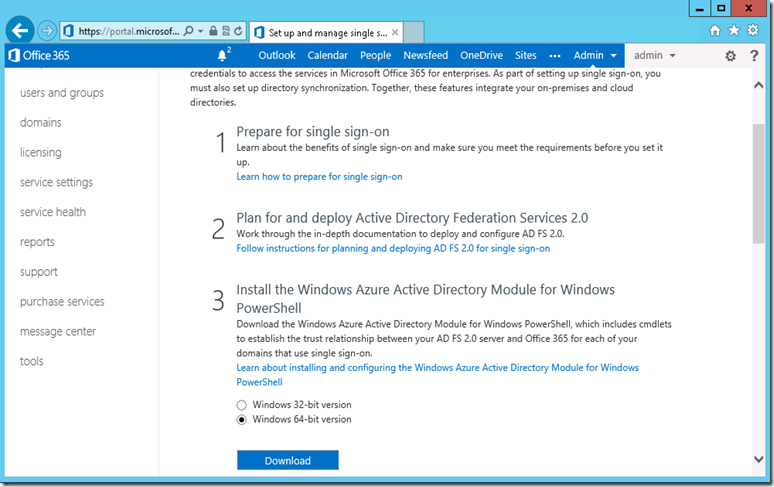
4. Scroll down to select Windows 64-Bit version of ‘Windows Azure Directory module for Windows PowerShell’. Click on ‘Download’ to get the file into the local computer.
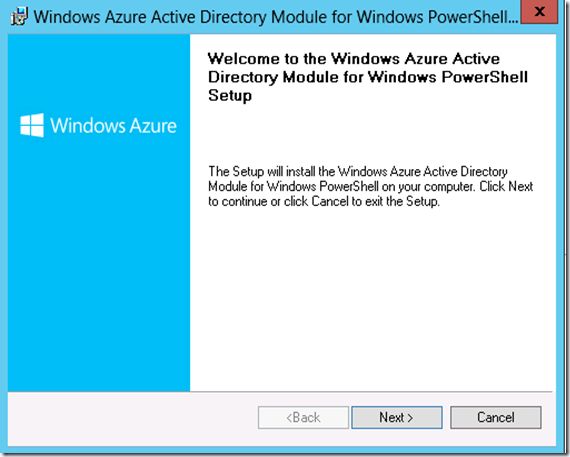
5. Perform the default installation of ‘Windows Azure Active Directory Module for Windows PowerShell’ by clicking ‘Next’
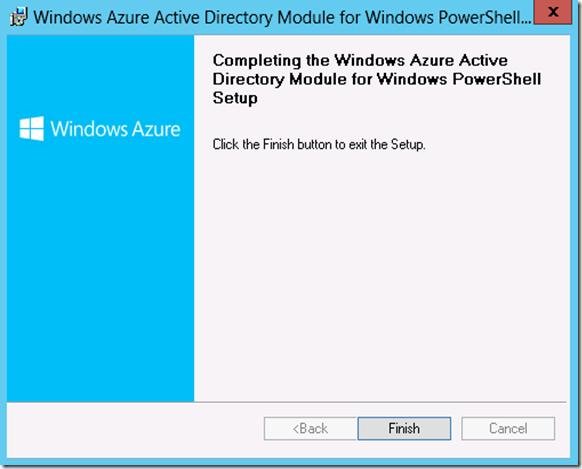
6. Click on ‘Finish’ to complete the installation.
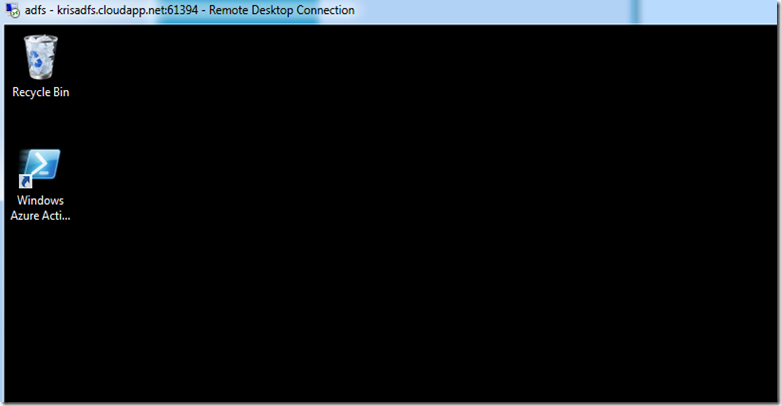
7. To configure federation between Office 365 and On-Premise, run the ‘Windows Azure Active directory PowerShell’ shortcut from the desktop
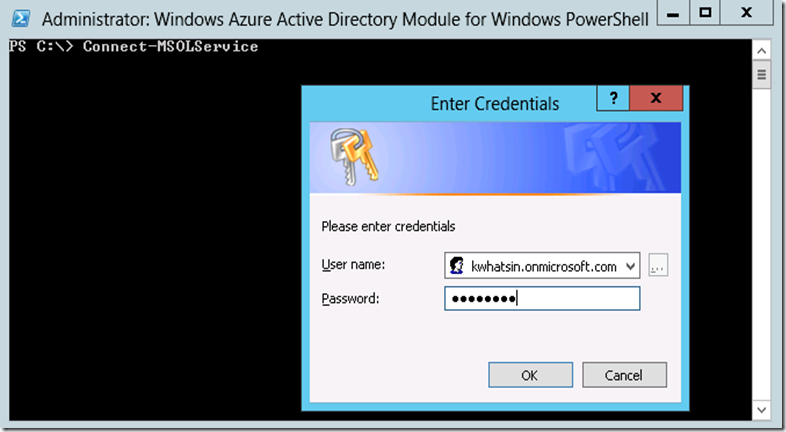
8. Connect to Office 365 by executing the PowerShell ‘Connect-MSOLService’ cmdlet. This execution will prompt for the credentials. Input the credentials as admin@checkwhatsin.onmicrosoft.com with password and click on ‘OK’
9. Once it is connected to the Office 365, we can manage it using PowerShell. Execute the command given below to get the details of all the domain registered in Office 365.
Get-MSolDomain

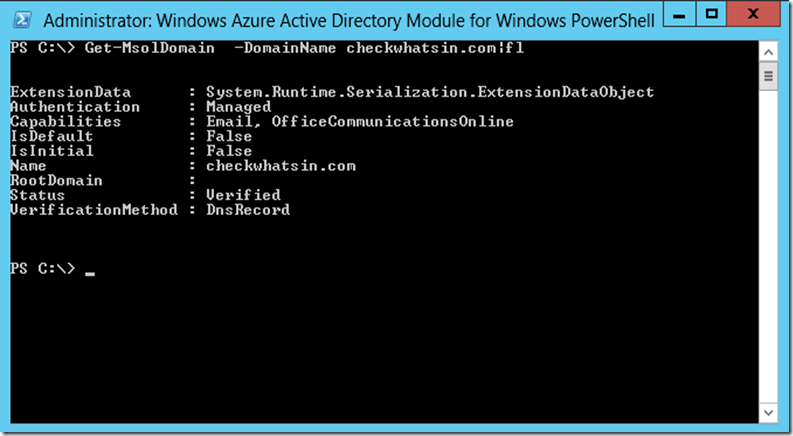
10. We also get a detailed information of the domain by executing the command. Since, we have not configured federation yet, authentication status is as ‘Managed’ for the domain checkwhatsin.com. Once federation is configured between Office 365 and on-premises, then the authentication status will change from managed to federated for the domain checkwhatsin.com
Get-MSolDomain –Domainname Checkwhatsin.com |fl
11. The Convert-MSOLDomainToFederated cmdlet converts the specified domain from standard authentication to single sign-on. To convert the domain checkwhatsin.com as Federated, execute the command that is given below.
Convert-MSolDomaintoFederation –DomainName checkwhatsin.com
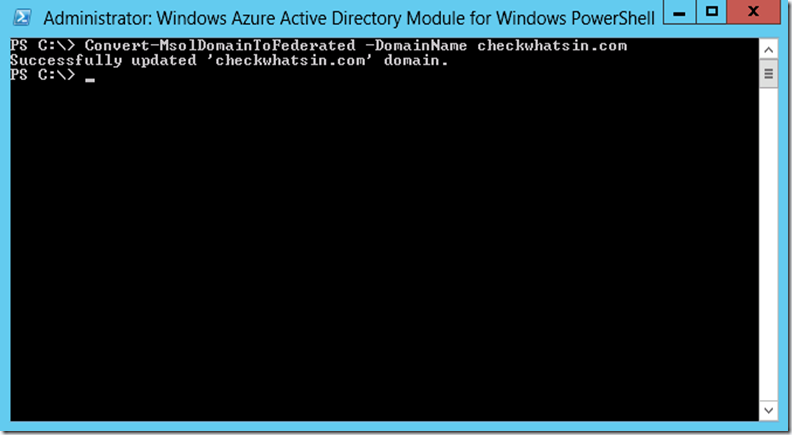
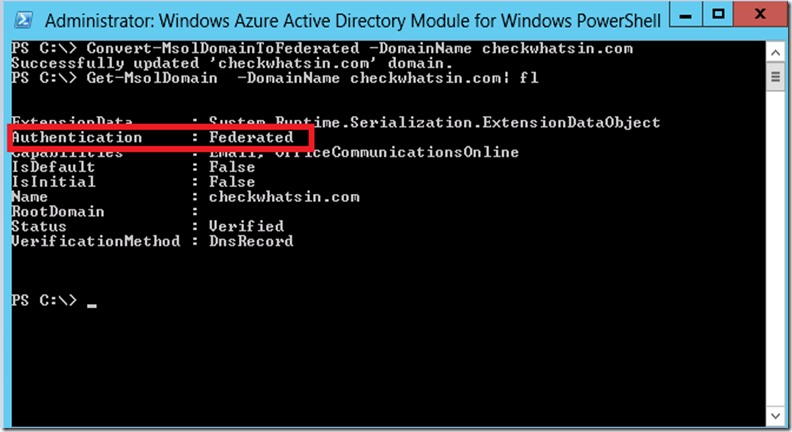
12. Successful execution details can be verified using the command given below and the screen has the authentication details changed to Federated.
Get-MSolDomain –Domainname Checkwhatsin.com |fl
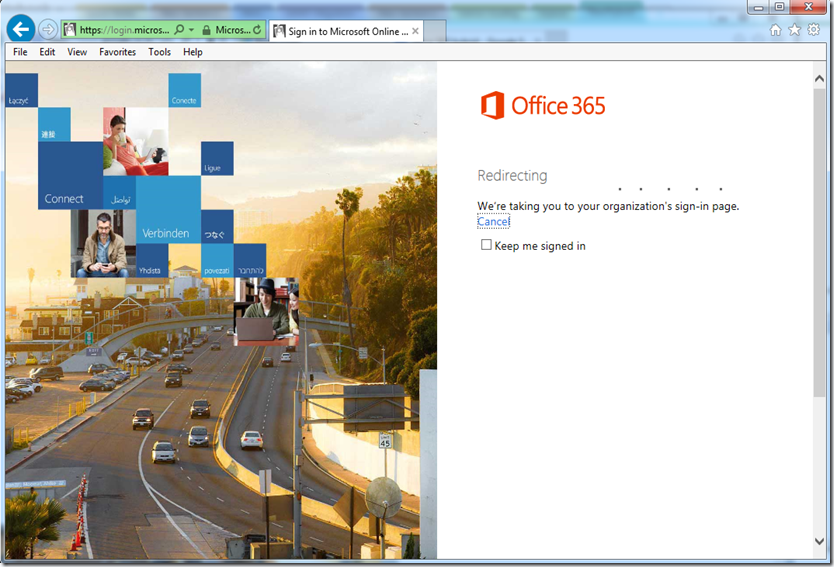
13. To verify if the ADFS federation is working , access the office 365 portal page from the browser and input the user name as admin@chekcwhatsin.com and just hit the tab button

14. This should automatically start the redirection process
15. Finally, this should connect us to the URL https://sts.chekwhatsin.com for the user authentication prompt
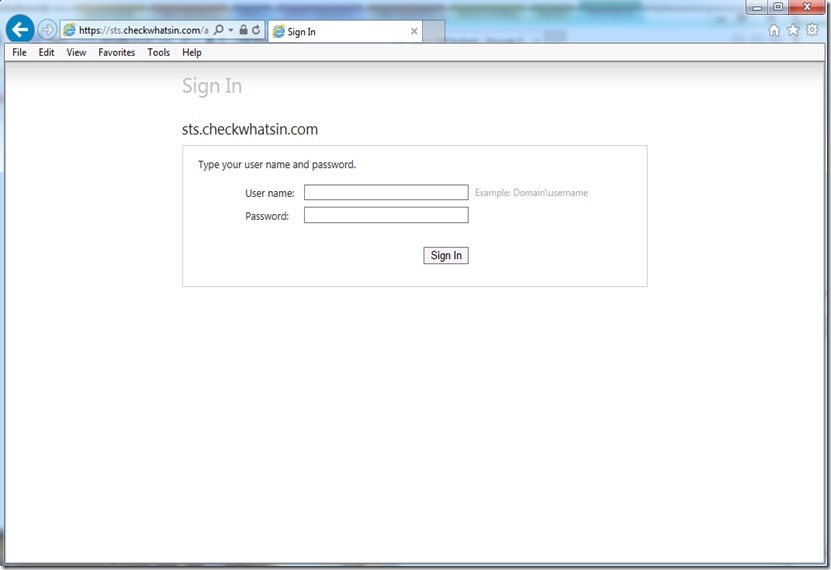
With this we have successfully completed the configuration of SSO between On-prem and Office 365.
Configuring Directory Synchronization between Office 365 and Exchange 2013 On-Prem
DirSync (Directory Synchronization) is a tool in making copies of local on-premises directory object into the Office 365 environment in a hybrid cloud deployment. DirSync service synchronizes object only from on-premises to Office 365 and it runs for every three hours to publish the changes from the on-premises to Office 365.
In this section, we will create a service account to configure Dirsync server on the server krisdirsync.cloudapp.net
Creating and configuring Service account for DirSync
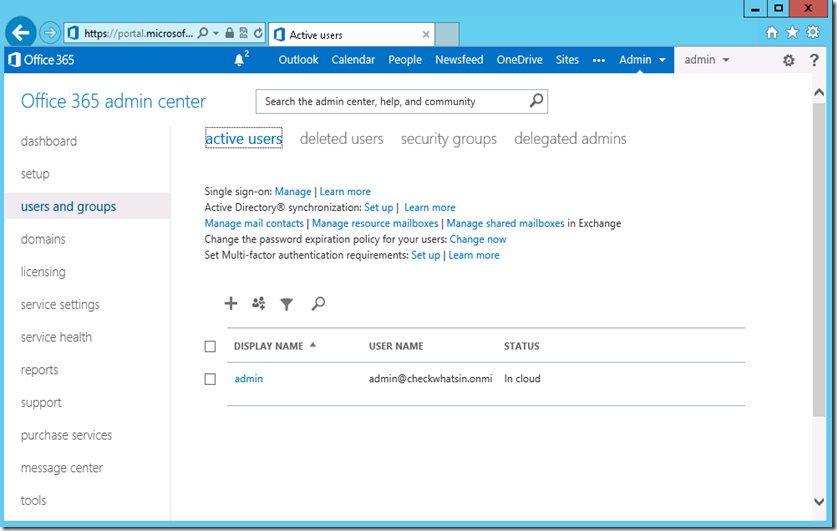
1. Login to the Office 365 portal with the organization admin account and click ‘users and groups’ from the left pane and click on + symbol to create a new account
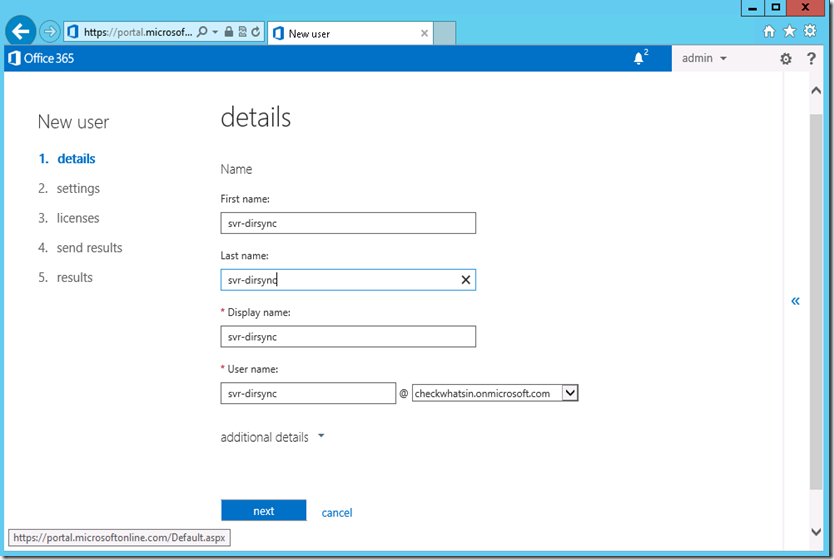
2. Input the service account name and other necessary details and click on ’Next’
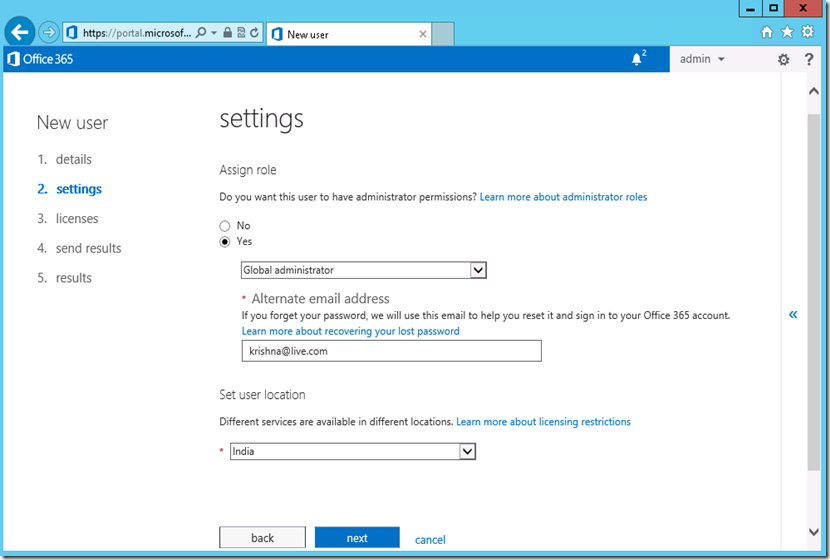
3. Select the Assign Role as ‘Global Administrator’ and input other details like ‘Alternative email address, ‘location’ and click on ‘Next’.
4. Since, this is a service account, it does not need a mailbox/license. Do not select any license and click on ‘Next’ to continue

5. Click on ‘Create’ button to create a new service account and send the service account details to the admin.
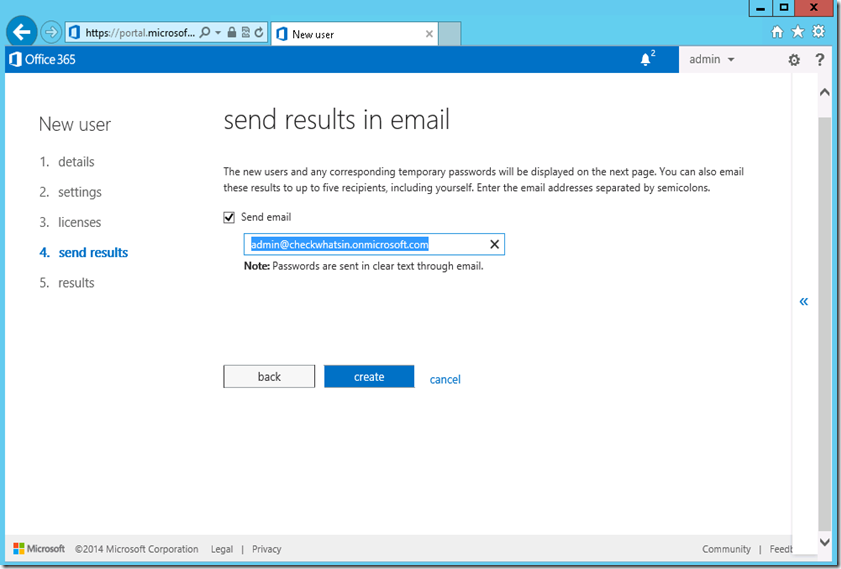
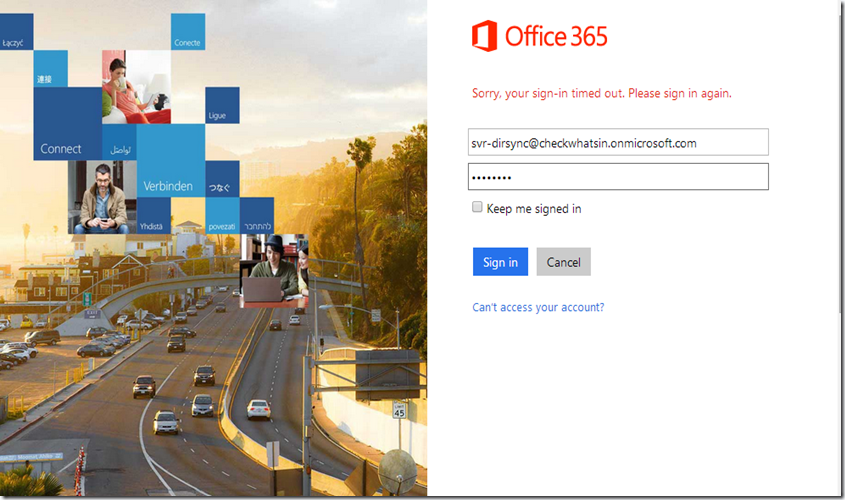
6. New account has to be logged in once to activate the account and set the new password. Hence, login to the Office 365 portal using the new service account
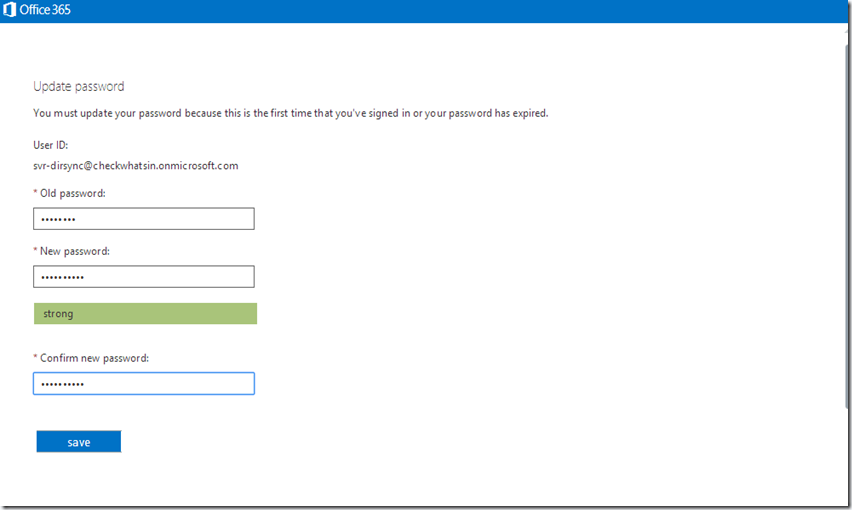
7. This will prompt us for a password change. Update the new password and re-confirm the same password. Click on ‘Save’ to set the new password for the service account.
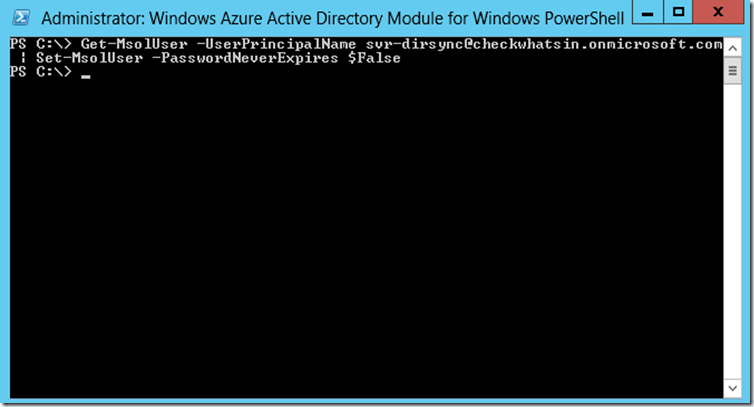
8. Office 365 has a password expiration policy set on all the accounts. Service accounts needed comply with the password expiration policy and they have to be disabled. To disable the password expiration, connect to the Office 365 Windows Azure Active Directory module for PowerShell and execute the below PowerShell cmdlet to set the password never expires to $false.
Get-MsolUser –UserPinrcipalName svr-dirsync@checkwhatsin.onmicrosoft.com | set-MsolUser –PasswordNeverExpires $false
Configuring Directory Synchronization between Office 365 and Exchange 2013 On-Prem
1. Login to Directory Synchronization server krisdirsync.cloupdapp.net with the domain admin credentials
2. Install .net Framework 3.5 Features from add ‘Roles and features’ wizard or we can use the below PowerShell cmdlet to install the same
Install-WindowsFeature NET-Framework-Core
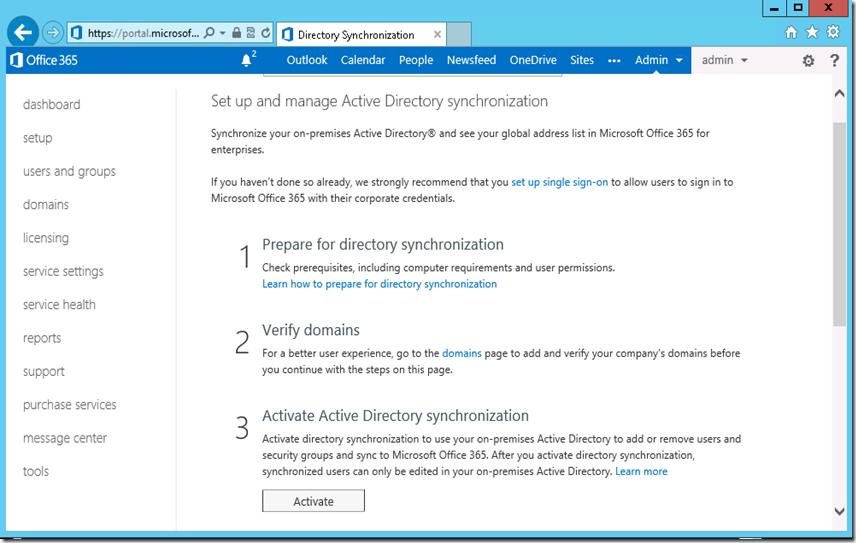
3. To start the active directory synchronization , connect to the office 365 portal from the browser and click on users and group and select Active Directory Synchronization :Set Up
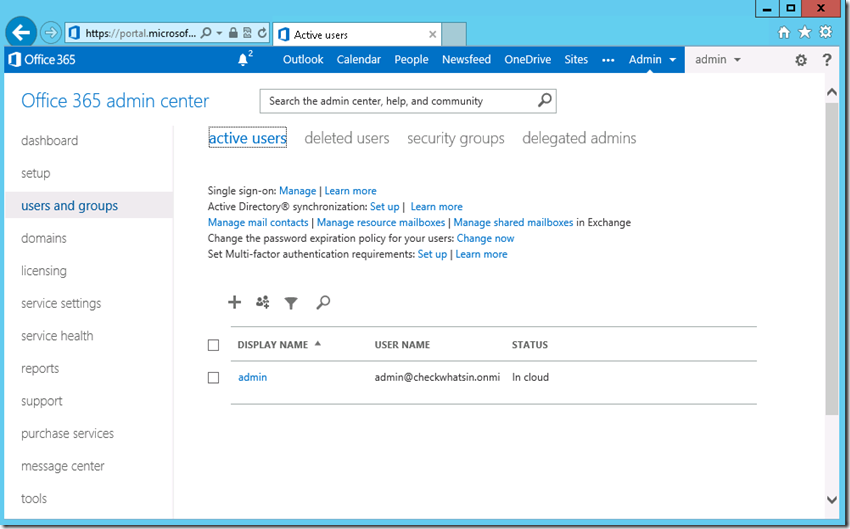
4. Select ‘Activate’ button to ‘Activate Active Directory synchronization’
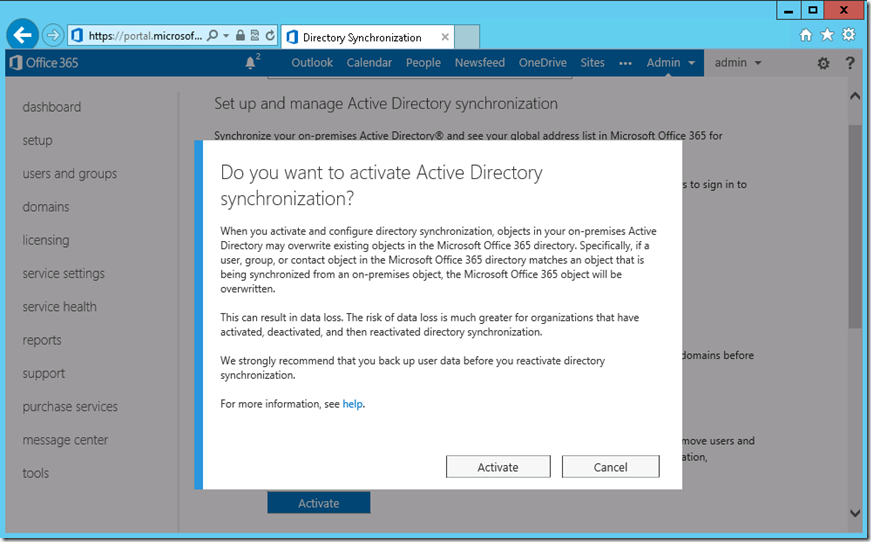
5. Confirm the activation process by clicking on the ‘Activate’ button again
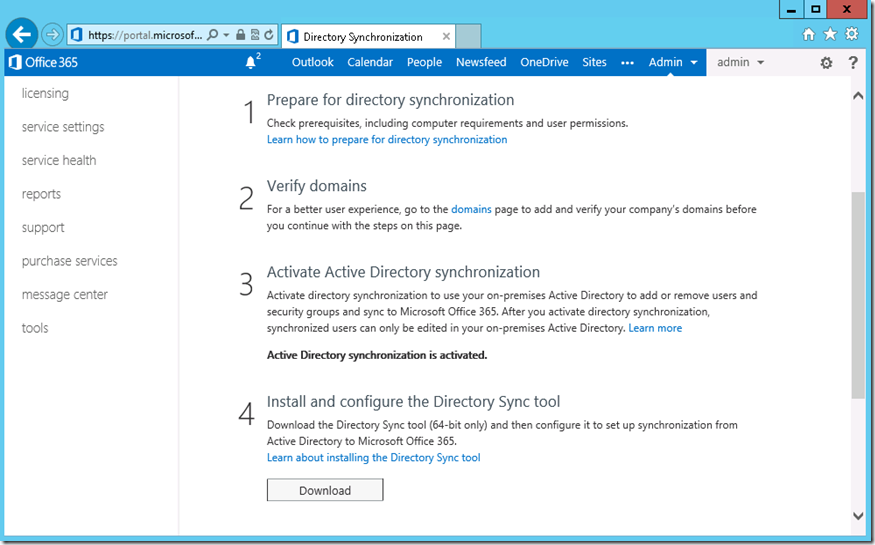
6. Once it is activated, we should be able to download the Directory Sync tool to and save the copy desktop
7. Dirsync is a small executable file, which needs to be setup to synchronize from an on-premises Active Directory to Microsoft Office 365

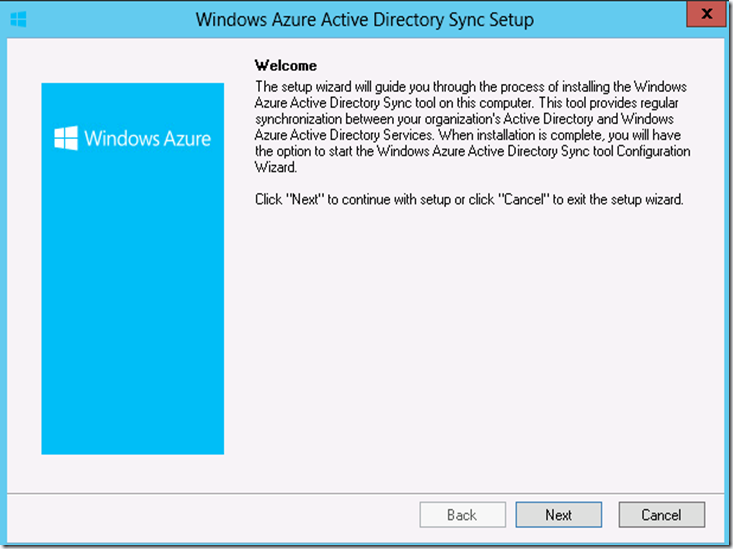
8. Start the installation of Dirsync by double clicking on it and click on ‘Next’ at the Welcome page.
9. Accept the licenses, default installation path and click on ‘Next’ to continue
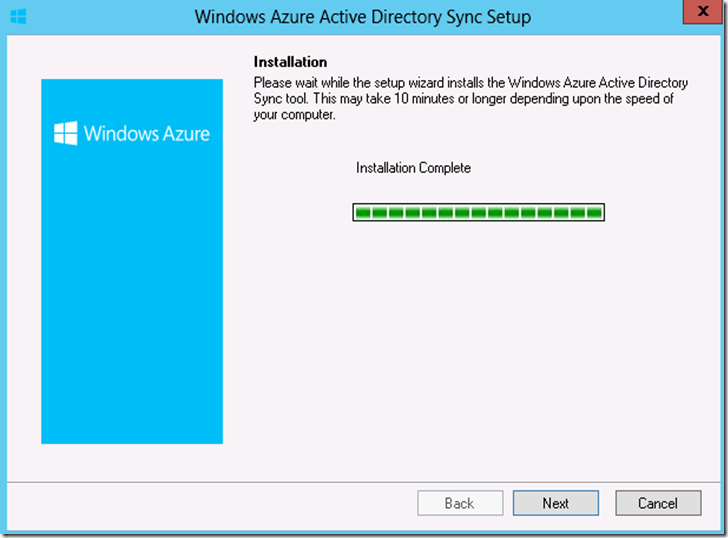
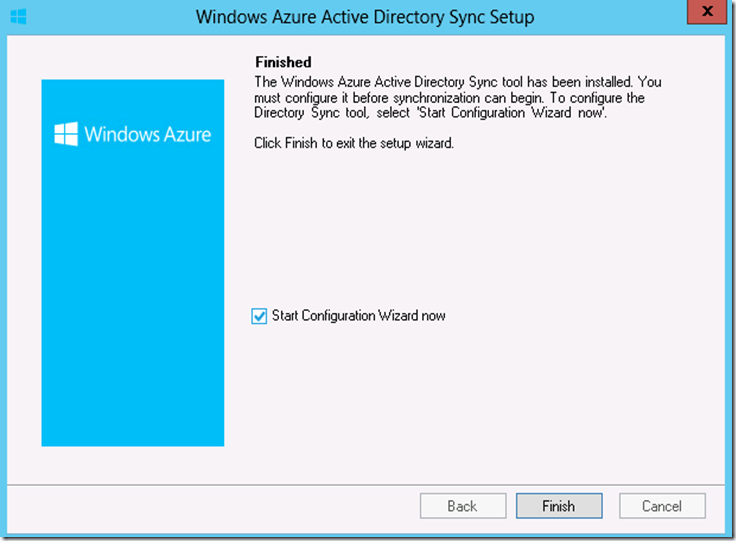
10. Click on ‘Finish’ to complete the installation and make sure to “Start Configuration Wizard now” is checked to start the configuration immediately.
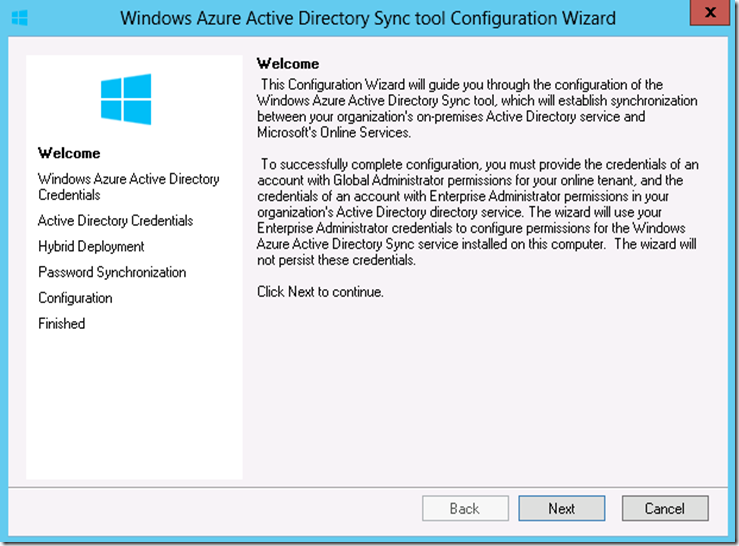
11. Start the Windows Azure Active Directory Sync tool configuration wizard with the click ‘Next’ on the Welcome page.
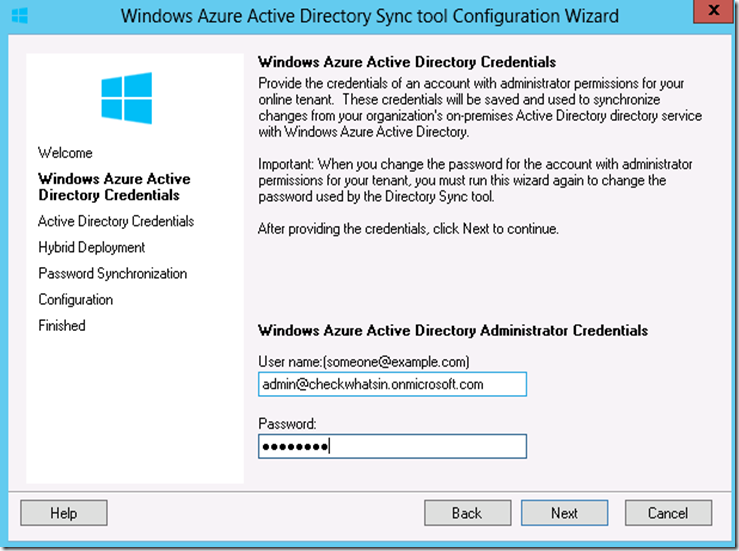
12. Provide Office 365 admin credentials at ‘Windows Azure Active Directory Credentials’ and click on ‘Next’
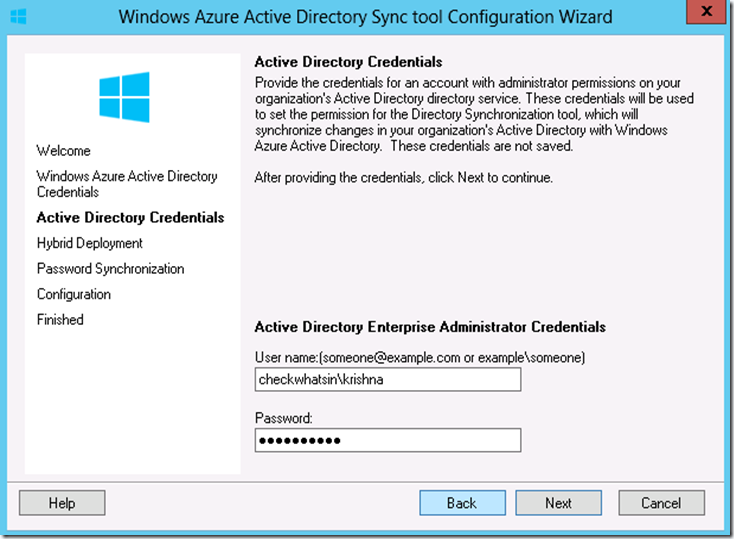
13. Type on-premises domain admin credentials at ‘Active Directory Credentials’ page and click on ‘Next’
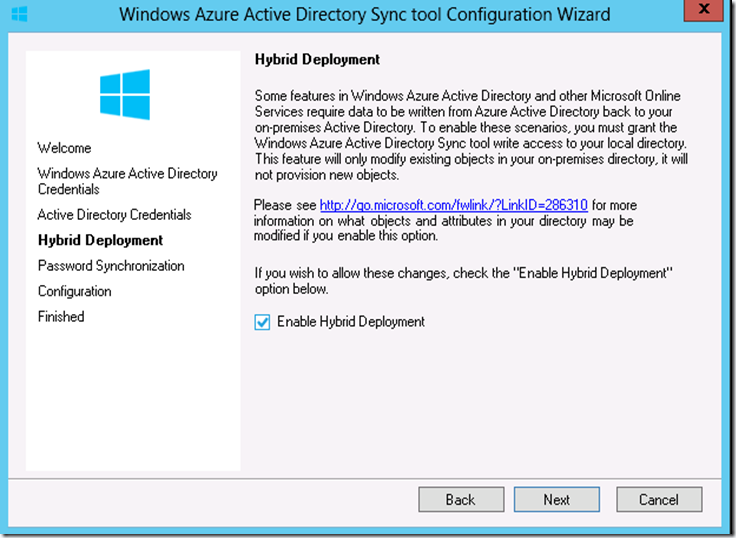
14. Since we are configuring Hybrid between Office 365 and on-premises, we need to make sure that the ‘Enable Hybrid Deployment’ is checked and then click on ‘Next’
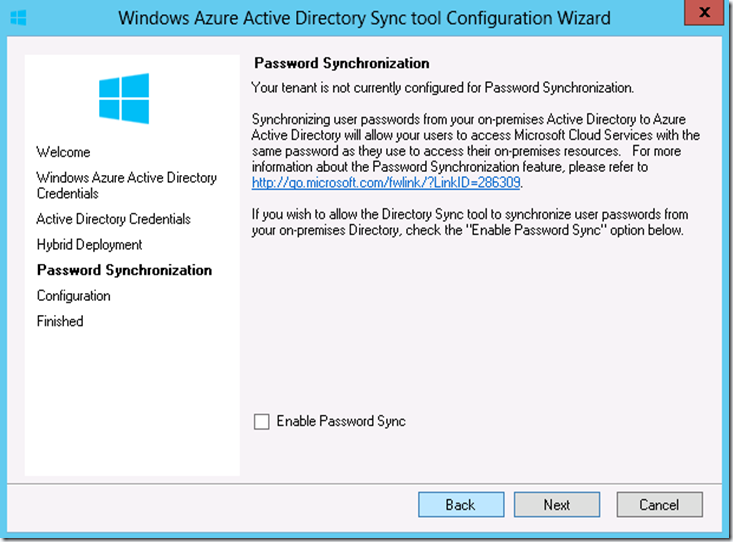
15. We do not need a password sync for SSO configuration. We create object at on-premises Active Directory and provision mailbox for the on-premises objects at Office 365. Hence, make sure to ‘Enable password Sync’ is unchecked and click on ‘Next’
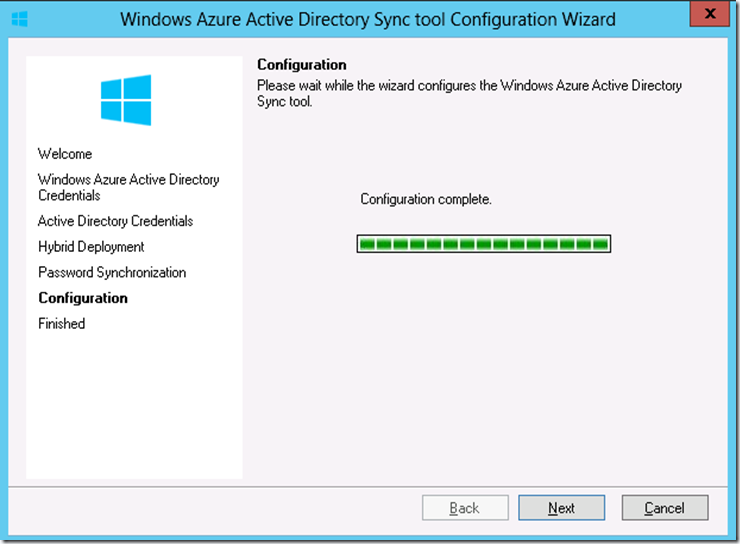
16. Wait for the ‘Configure complete’ status on the configuration page and click on ‘Next’
17. Click on ‘Finish’ at the wizard and make sure to select ’Synchronize your directories now’.
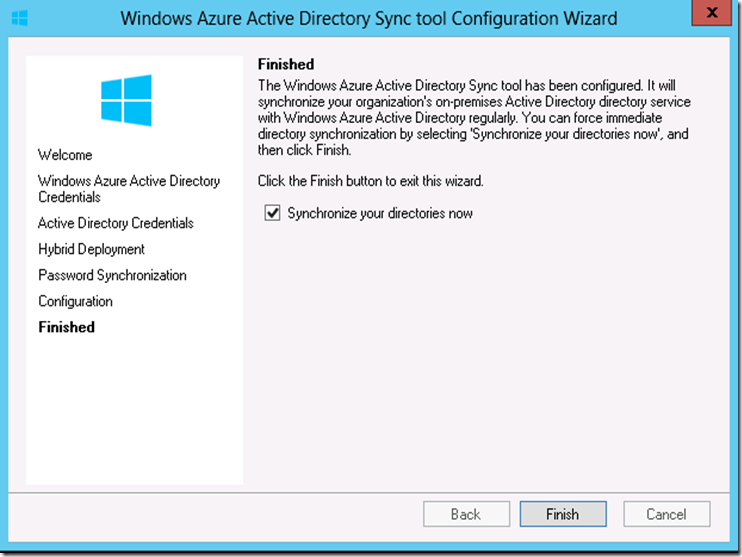
18. The active directory sync will immediately synchronize the objects from on-premises to Office 365. Then, click on ‘OK‘

19. Login to the Office 365 portal to verify the synchronization of On-prem objects as “Synced with Active Directory” at users and groups. Shown below is the reference snap with marked red has the details of the objects ‘Synced with Active Directory’

With this we have come to the end of this article series, where we have successfully configured SSO and Directory synchronization between on-premises and Office 365. We are almost ready with the Windows Azure environment to configure Hybrid setup.
In the next part we will be creating and configuring Hybrid between Windows Azure and Office 365.
Other part of the articles are be found below
Office 365 Hybrid Configuring Using Windows Azure – Part 1
Office 365 Hybrid Configuring Using Windows Azure – Part 2
Office 365 Hybrid Configuring Using Windows Azure – Part 4
Office 365 Hybrid Configuring Using Windows Azure – Part 5
Office 365 Hybrid Configuring Using Windows Azure – Part 6


